
Overview
Workflows is a tool to help Clozd clients automate the qualitative feedback collection process. This article provides an overview of Workflows and covers how to set up and manage Workflows in your win-loss program. This article contains:
-
- Configuration
- Outreach
- Publish
- Contributors (optional)
Related articles:
- How to manage deals as a contributor
- Sequences (for Admin)
- Workflow Management
- Default Email Templates
Overview and Benefits of Workflows
In order to successfully collect qualitative feedback from customers, you need to identify target customers / deals, collect accurate contact information, get internal approval to reach out to target customers, and reach out to contacts to schedule interviews. Without Clozd, this process is manual and time-consuming, and it’s difficult to track progress. When outreach is delayed, customer contacts are less likely to respond and share valuable feedback.
Workflows streamlines program participation with the following features:
- Simplified processing - Automatically sort incoming deals into their appropriate workflows and identify deals that need attention before outreach can begin.
- Improved collaboration - Easily collect contacts and request approval from sales reps. and other key stakeholders through the new Contributor Portal feature.
- Automated outreach - Automatically reach out to contacts once they are qualified and sit back as customer interviews are scheduled and published.
- Increased visibility - Monitor the stage of deals and status of participants as they progress through the outreach pipeline and identify bottlenecks in the process.
Creating a Workflow
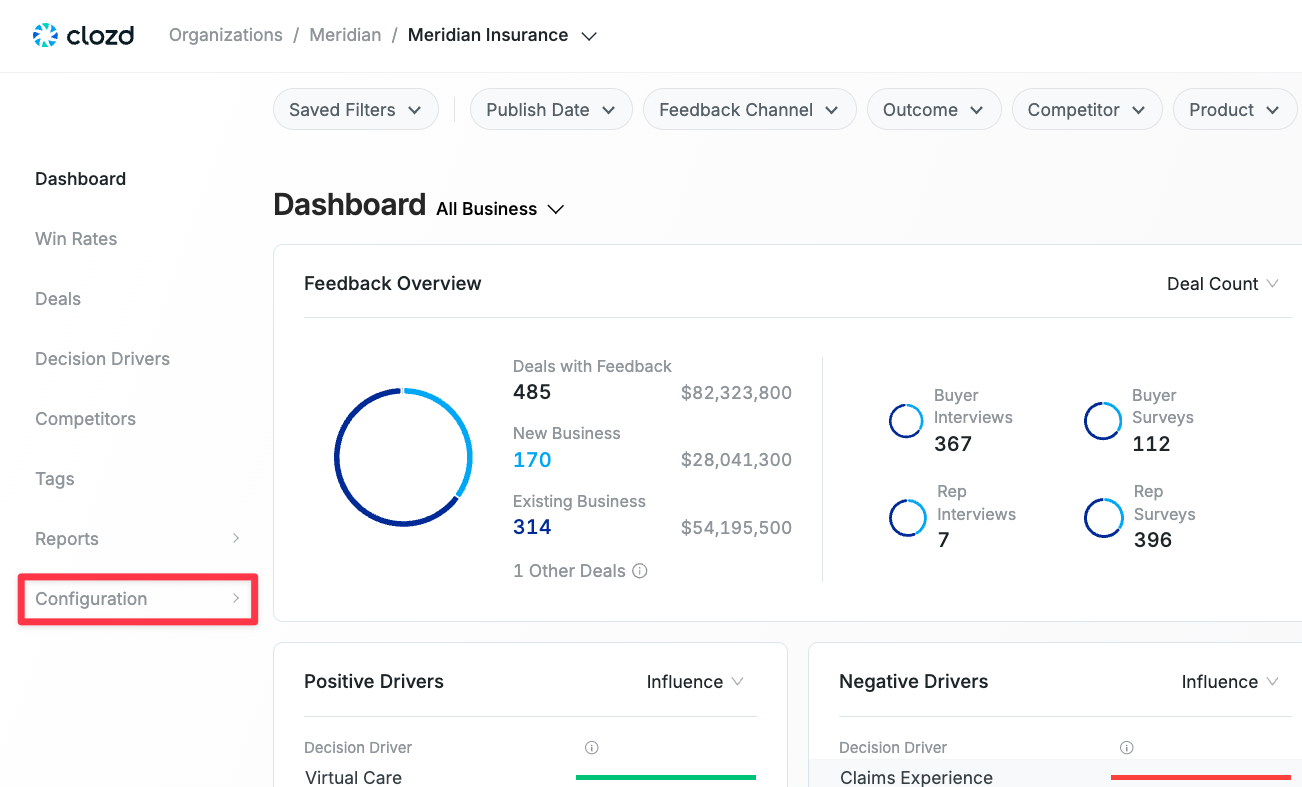
- Click on Configuration
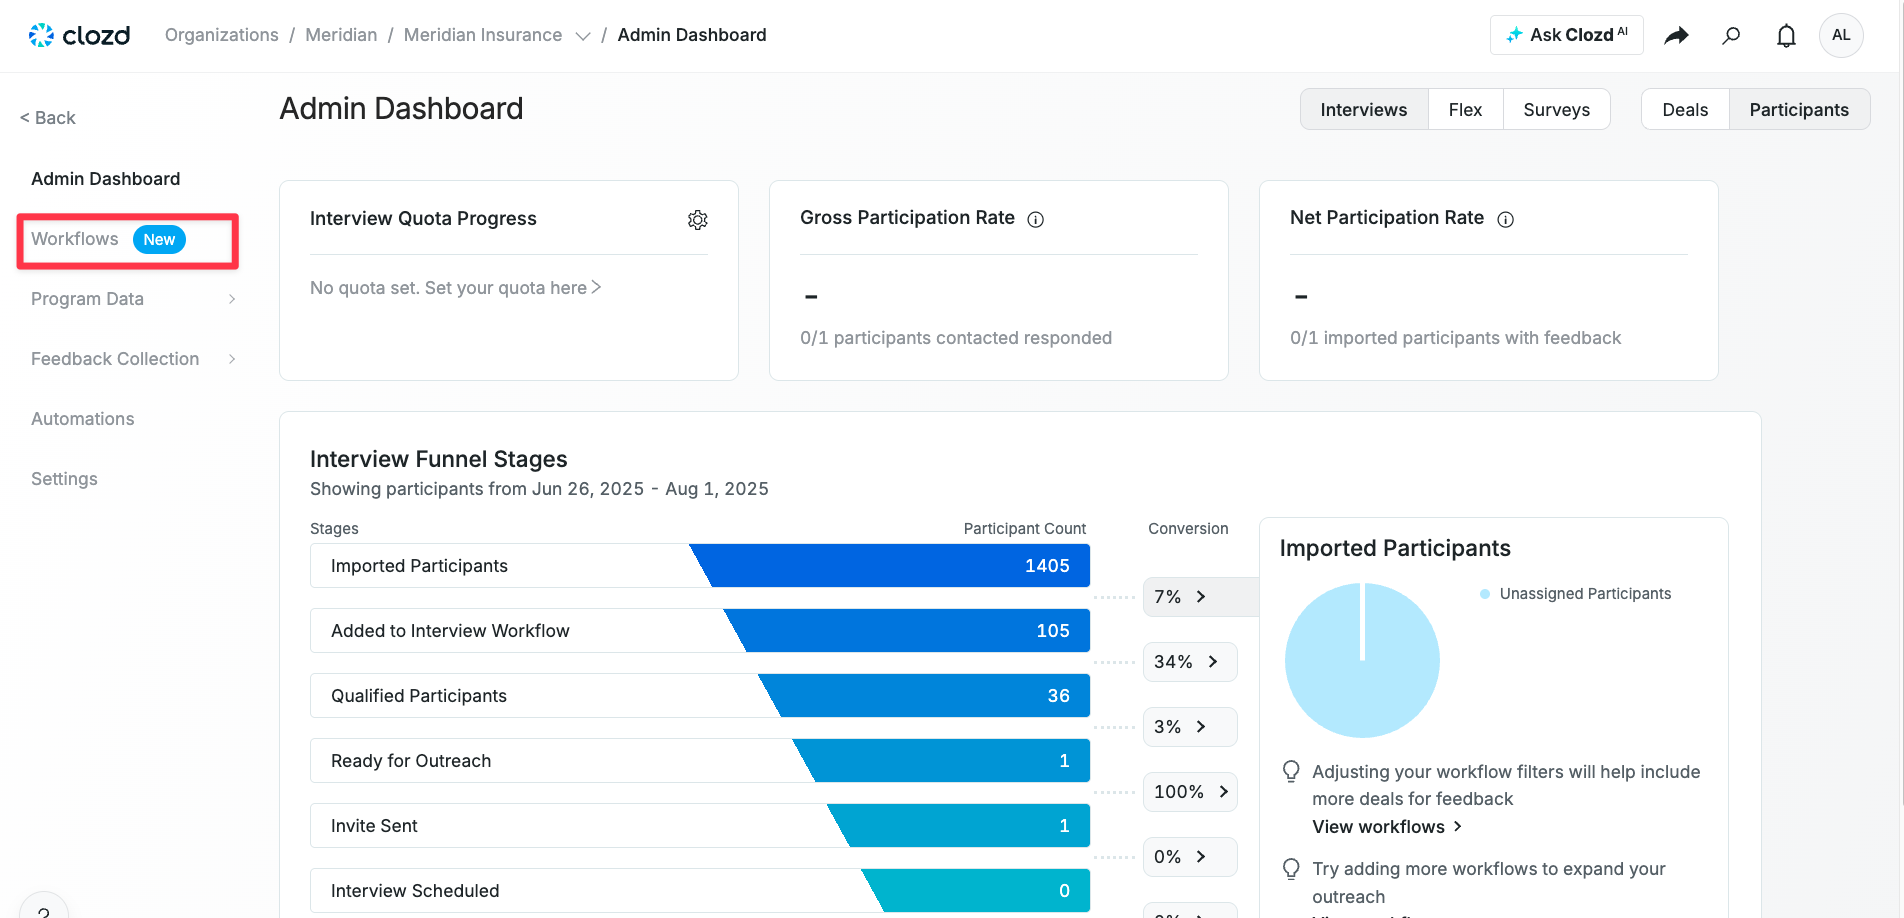
- Navigate to the Workflows tab
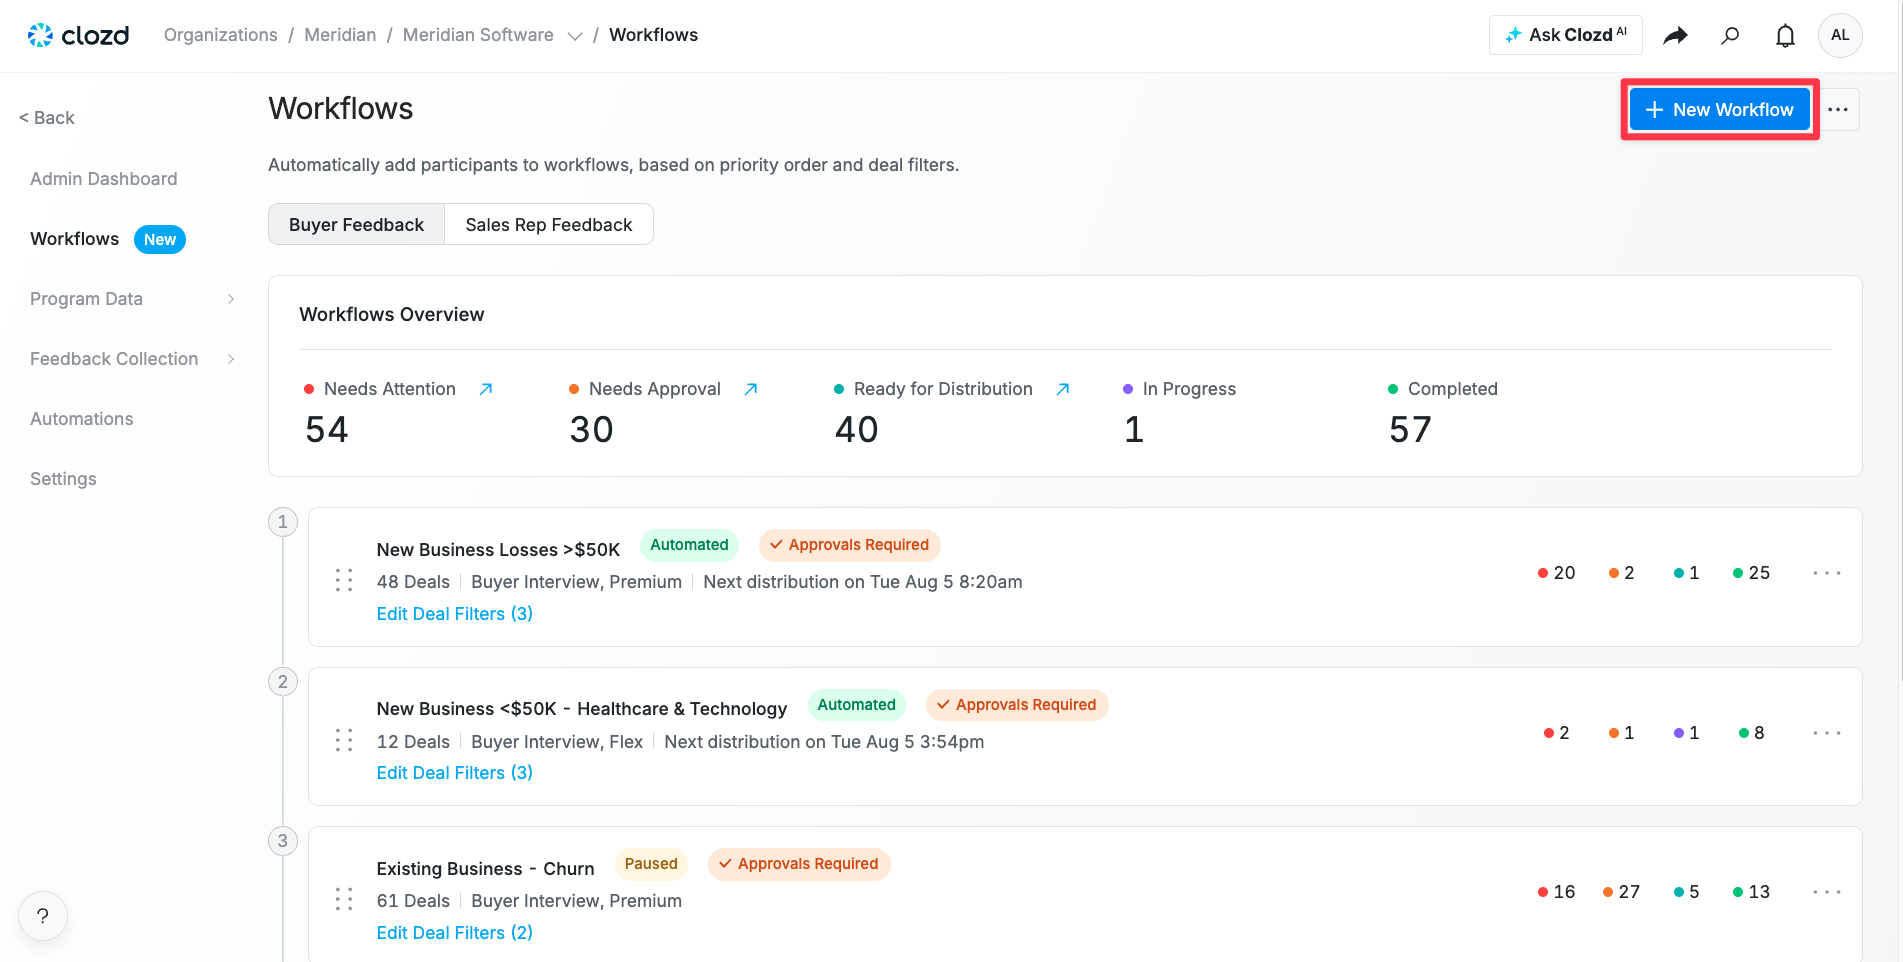
- Click the + New Workflow button
Configuration - Enter a workflow name.
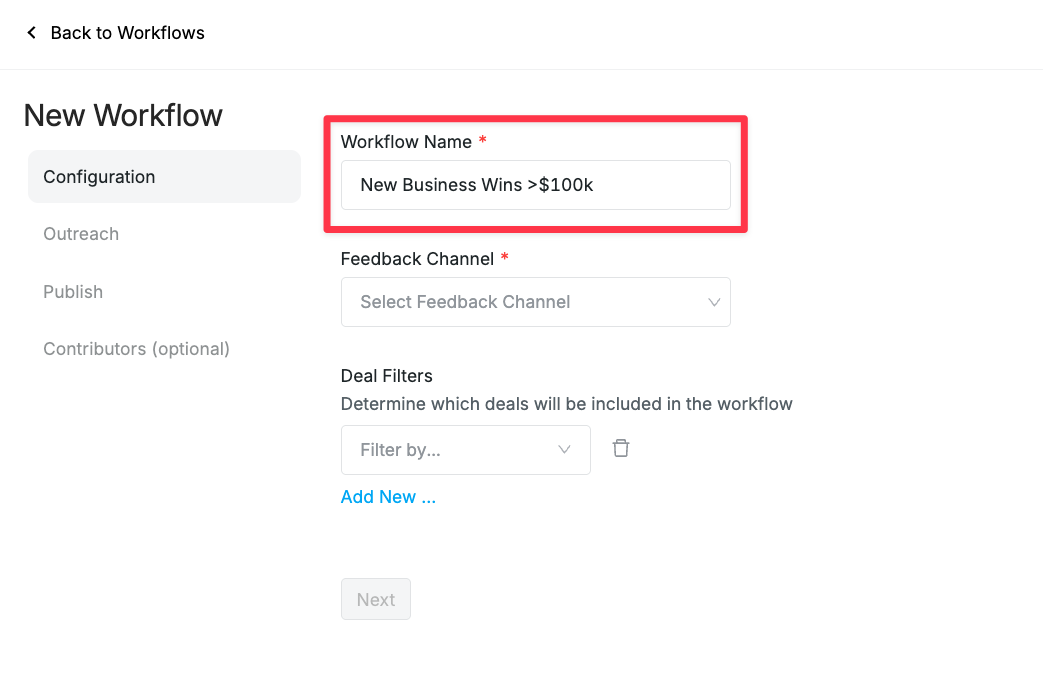
Note: The name should reflect the type of deals that you expect to be included in the Workflow (e.g., New Business Wins >$100K) - Select the Feedback Channel to be used for the Workflow.
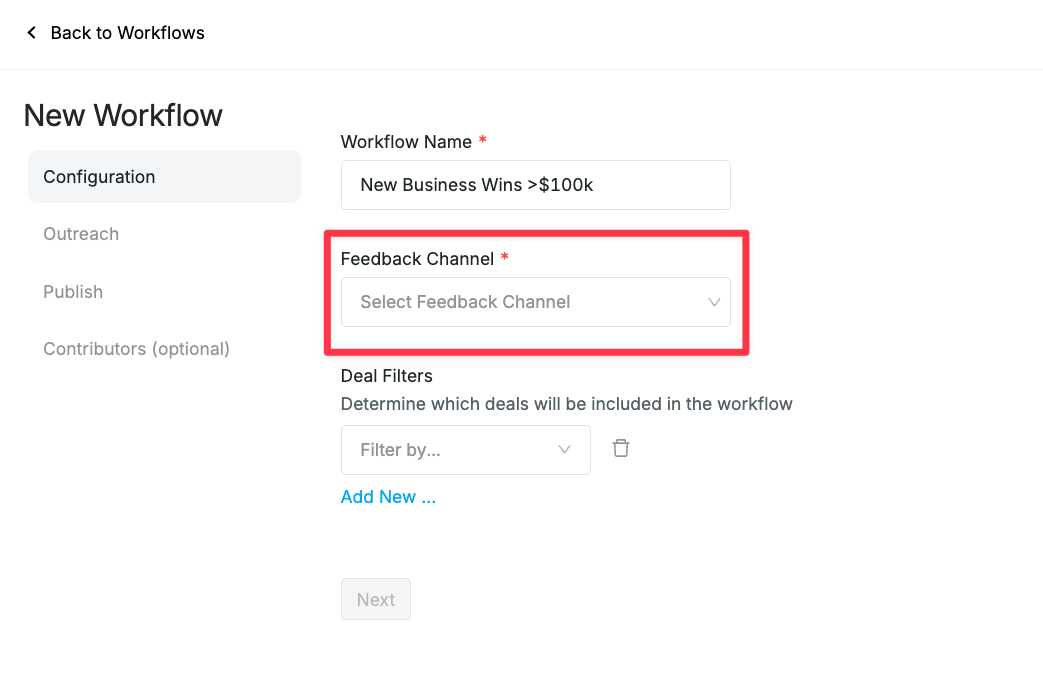
You can choose either Buyer Interview or Buyer Survey.
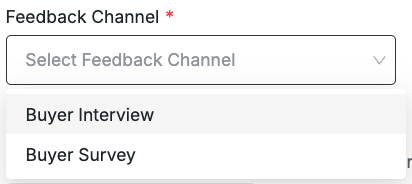
Feedback Channel is the only setting that cannot be edited later once the Workflow is created. Double check that it is correct. - Once you've selected the Feedback Channel, you will be able to choose the Interview Type.
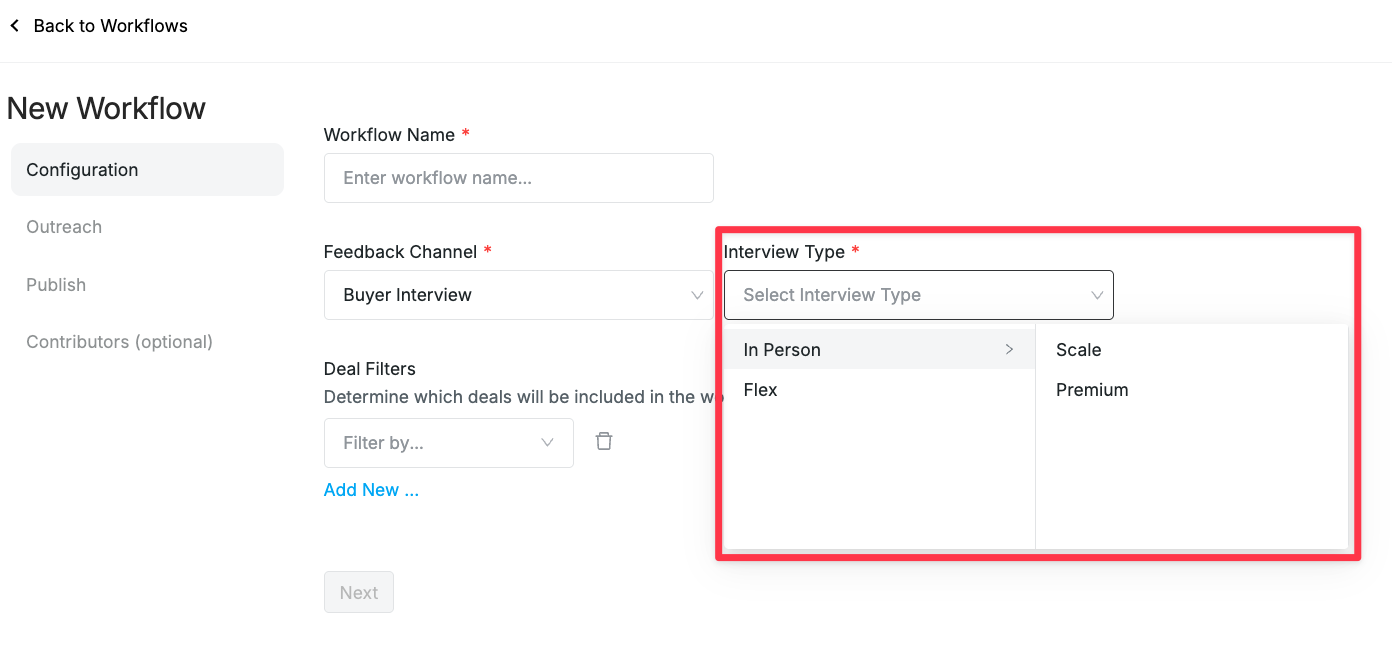
In Person interviews have the option of Scale and Premium, while the Flex interview is an asynchronous, recorded interview that lets your buyers respond on their own time, making it easier to gather insights without scheduling live conversations. - Deal filters are used to determine which deals will be sorted into the Workflow as they are imported into the Clozd platform.
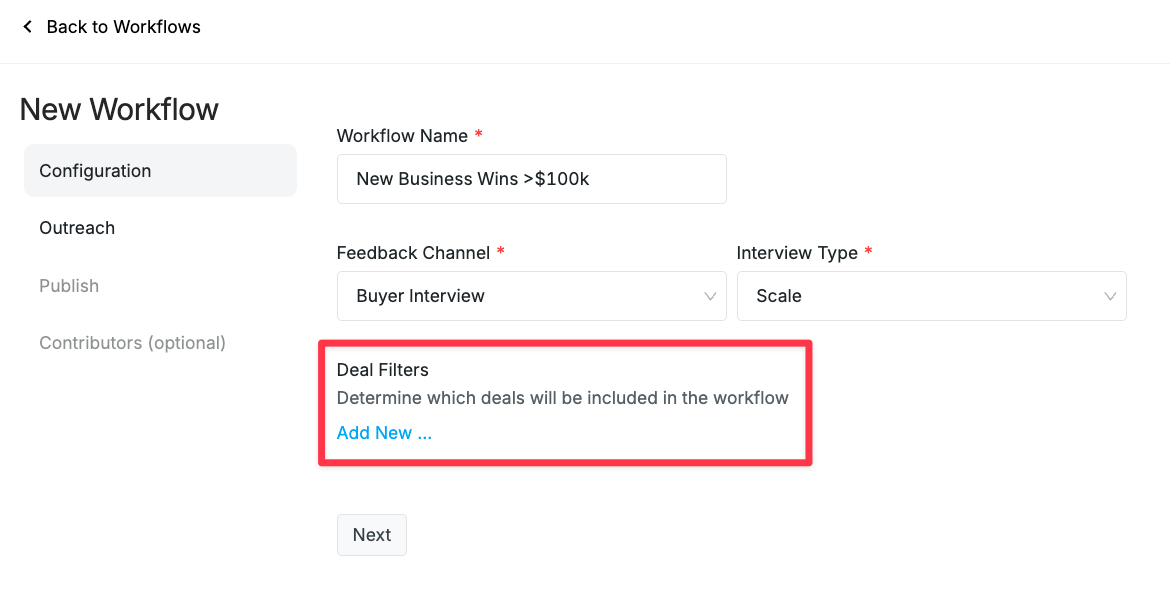
The options for creating a filter are Add Filter and Add Logic Block.
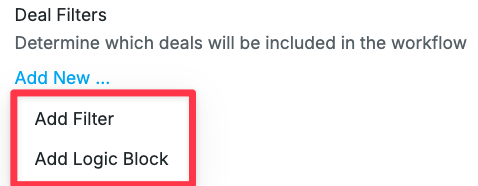
Add Filter, shown below, is used to nest a new condition within an existing one, using AND/OR logic. This is useful when you want multiple conditions to work together within the same logical group.
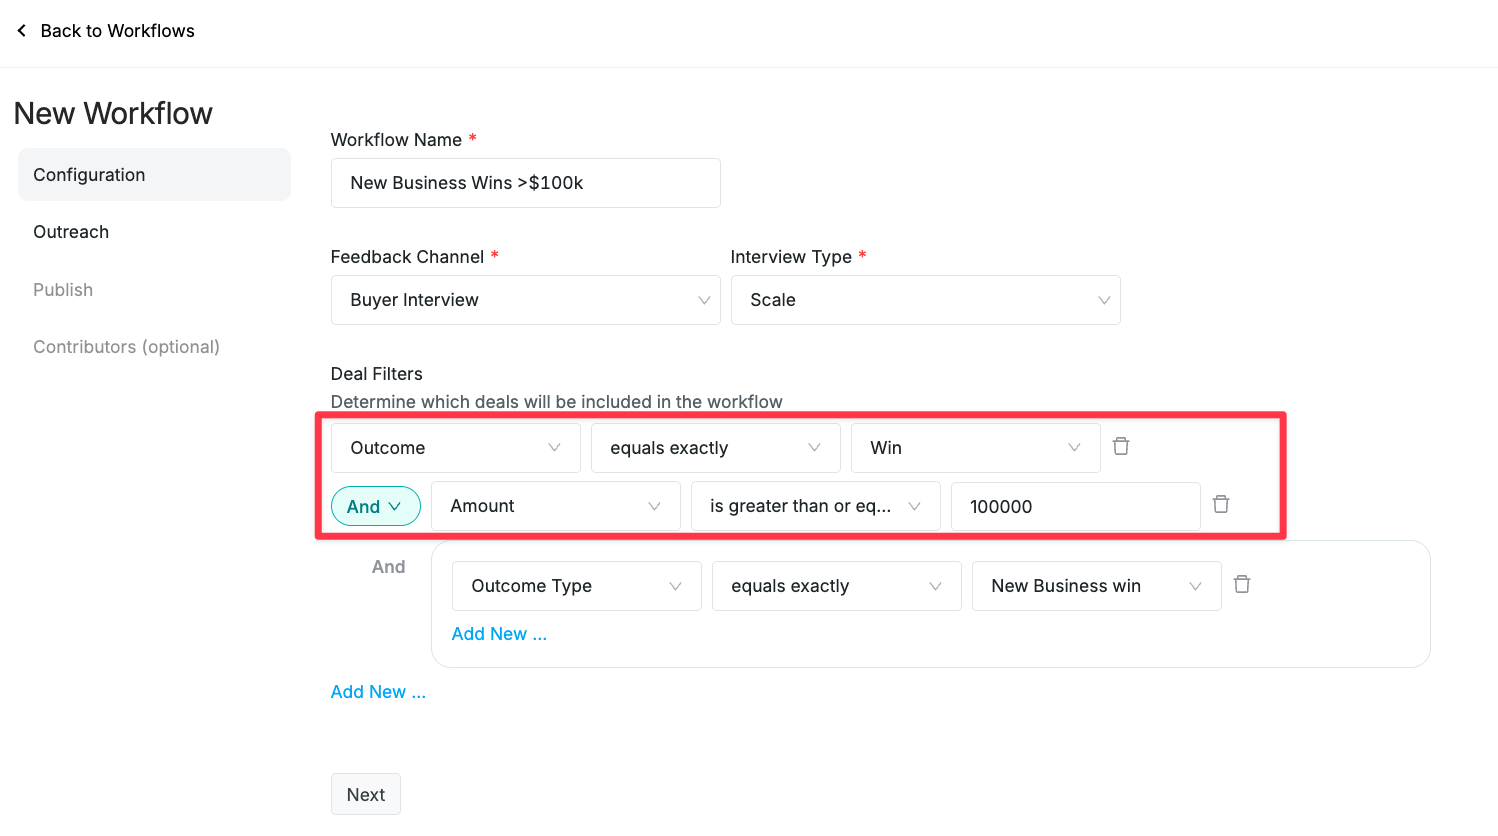
Add Logic Block, shown below, creates a new, separate group of conditions, evaluated independently from others. Logic blocks are always connected using AND logic, allowing you to build more complex and modular filter structures.
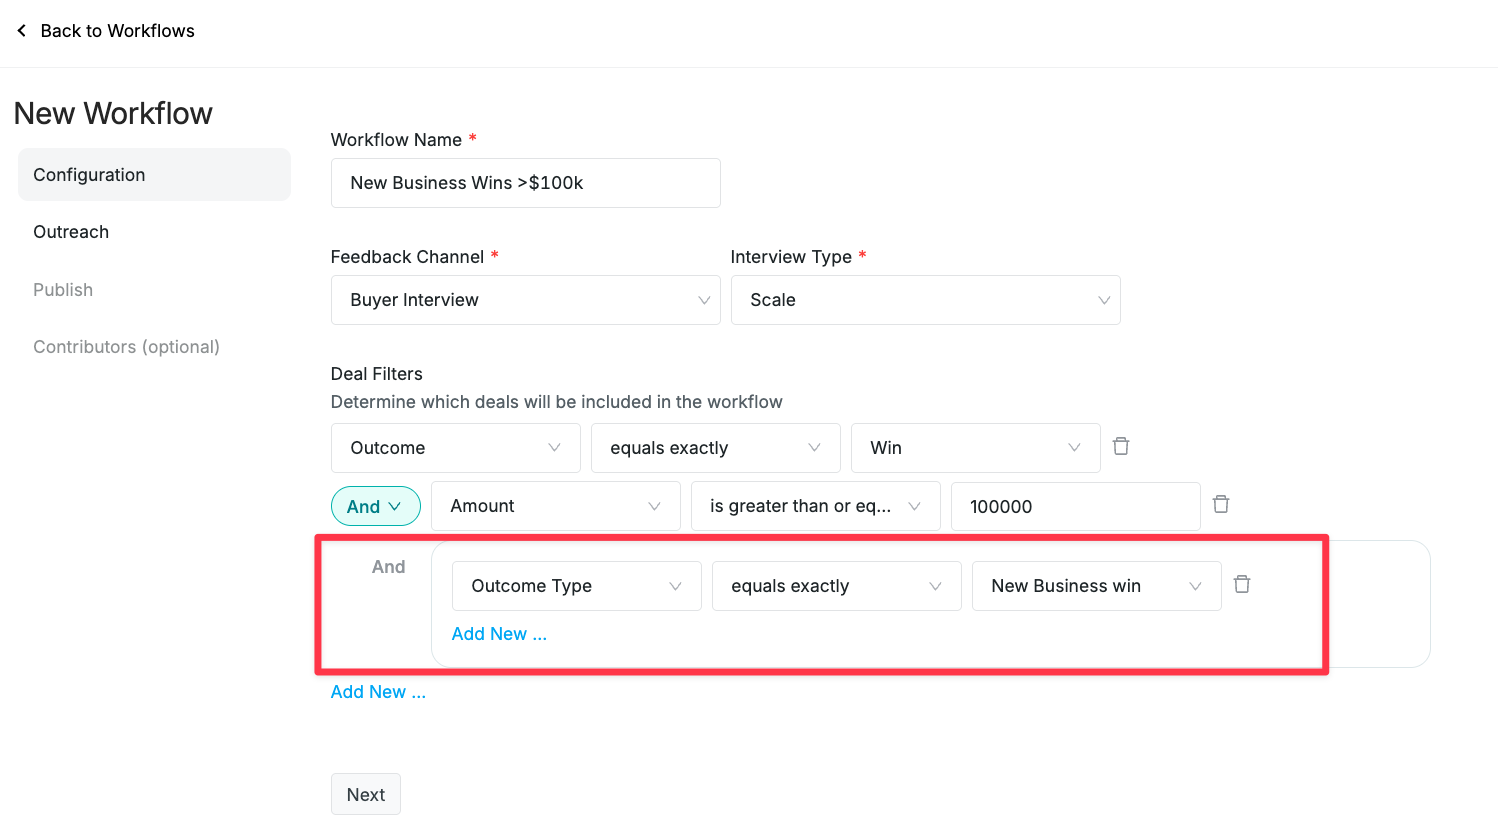
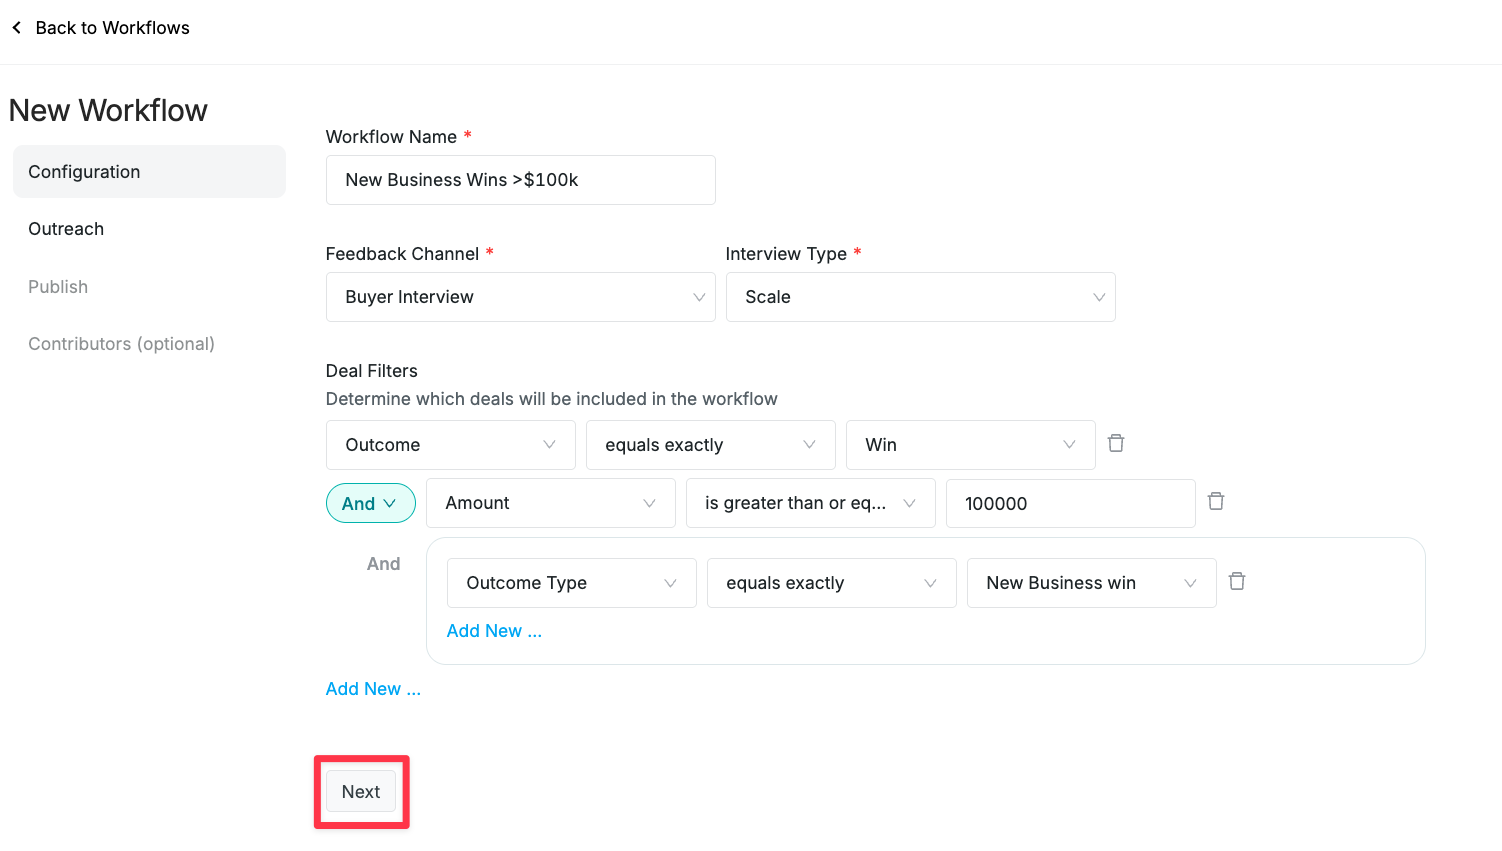
Note: Too many filters could decrease the feedback rate for your program. - Click Next to move on to the next part of Workflow setup.
Outreach - Select the Sequence you want to use for this Workflow from the list of previously built Sequences. Once selected, you can click View/Edit Sequence to make any necessary changes. For help with Sequences, check out the Sequences article.
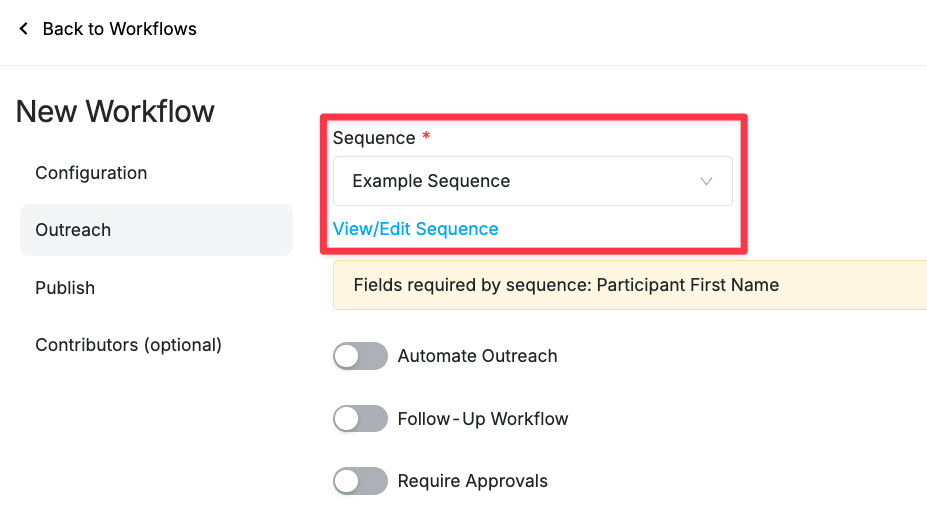
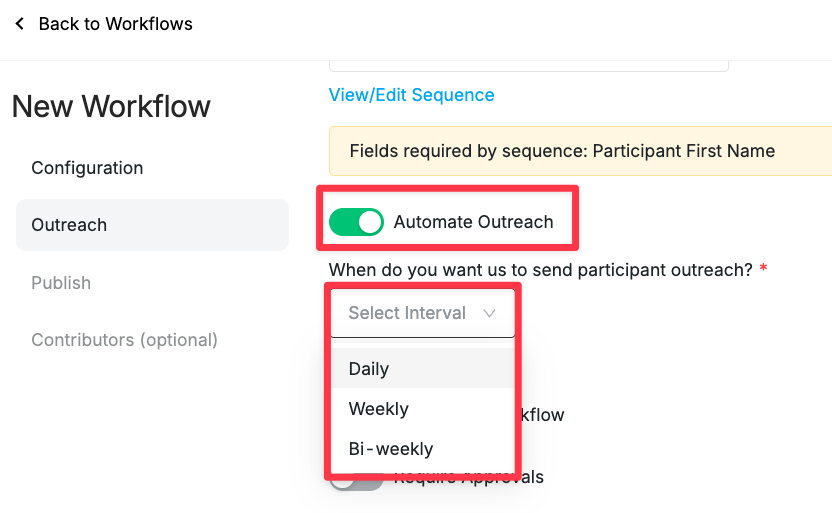
- (Optional) Turn on Automated Outreach for the Workflow and set up a regular cadence for reaching out to qualified participants. Automation can be paused later if needed.
Select the interval for how often Outreach will reach out to qualified participants. The options are Daily, Weekly, or Bi-weekly.
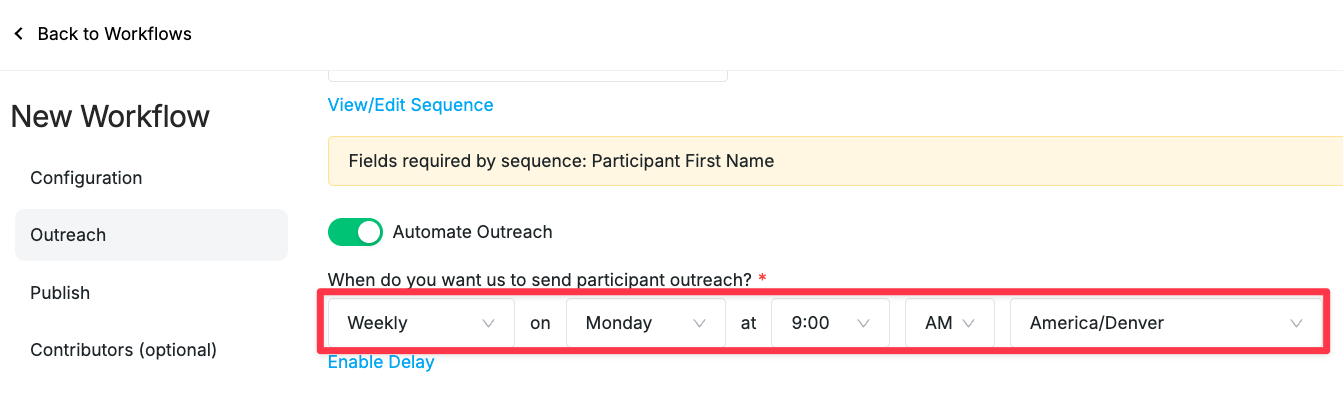
Once you've selected the interval, choose which day and time for outreach.
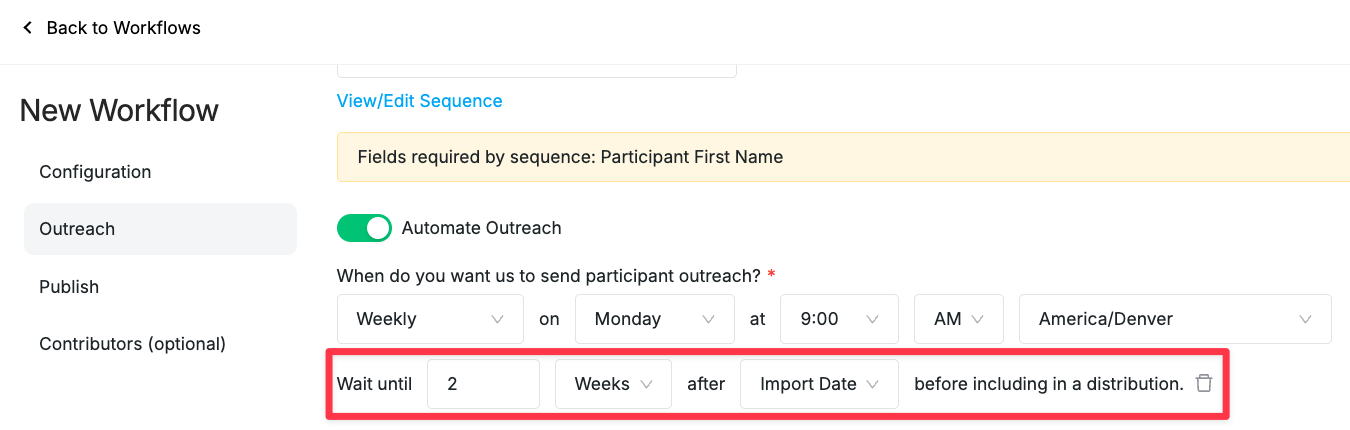
If you'd like to wait a certain amount of time after the Import date or Closed date, Click Enable Delay and select the appropriate delay.
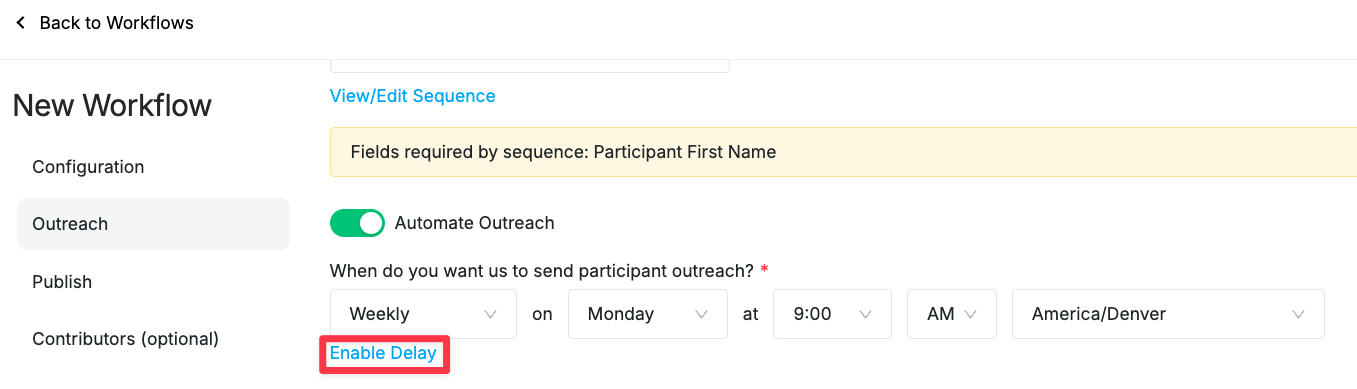
You can set a delay in outreach by specifying a number of days or weeks after either the import date or the closed date.
- (Optional) Turn on Follow-Up Workflow for the Workflow. This follows up with any deal in a different workflow that meets the current workflow's criteria that have the stage 'No Feedback.'
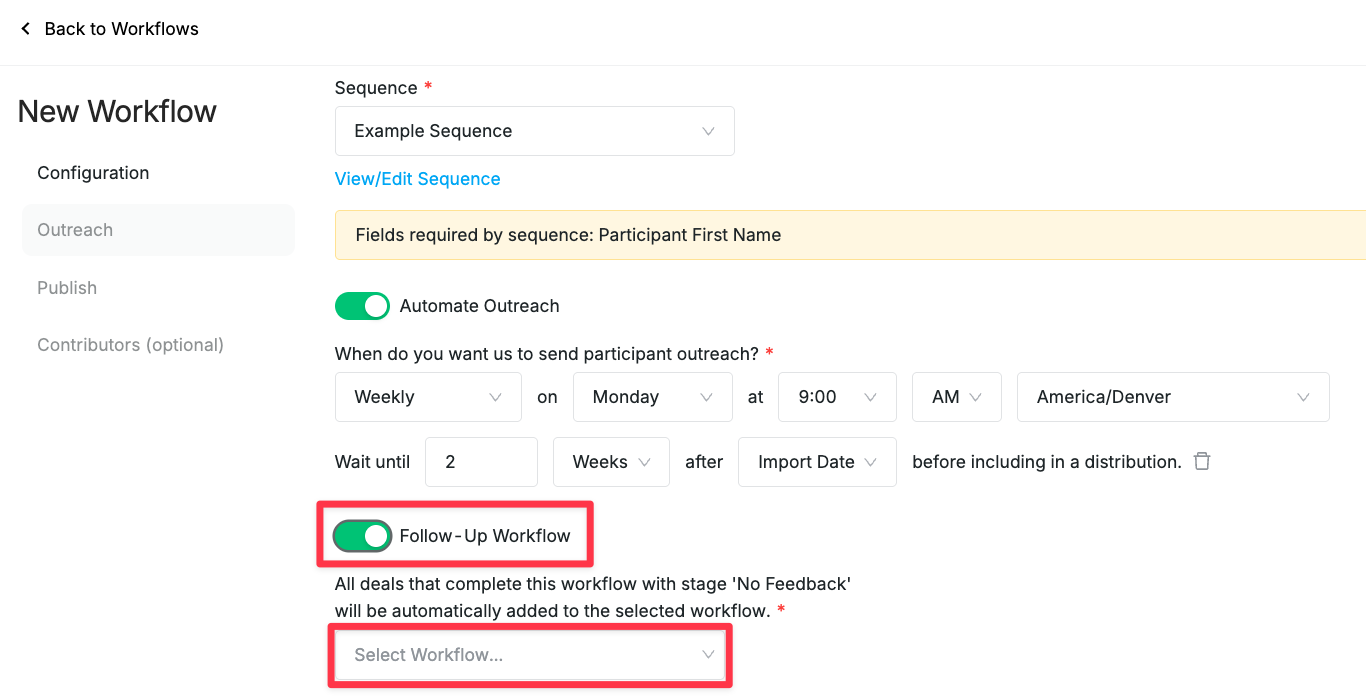
Once you turn on Follow-Up Workflow, select which workflow (that is already created) you want to use. The point of a Follow-Up Workflow is to follow up with participants who don't respond. For example, if a participant doesn't sign up for a call, we can send them a Flex interview invitation, or survey, depending on the Follow-Up Workflow you want to use. - (Optional) Turn on Required Approvals for the Workflow. This can only be turned on if Automate Outreach is enabled. A deal will not be Ready for Outreach until someone has approved the deal or its respective participant(s).
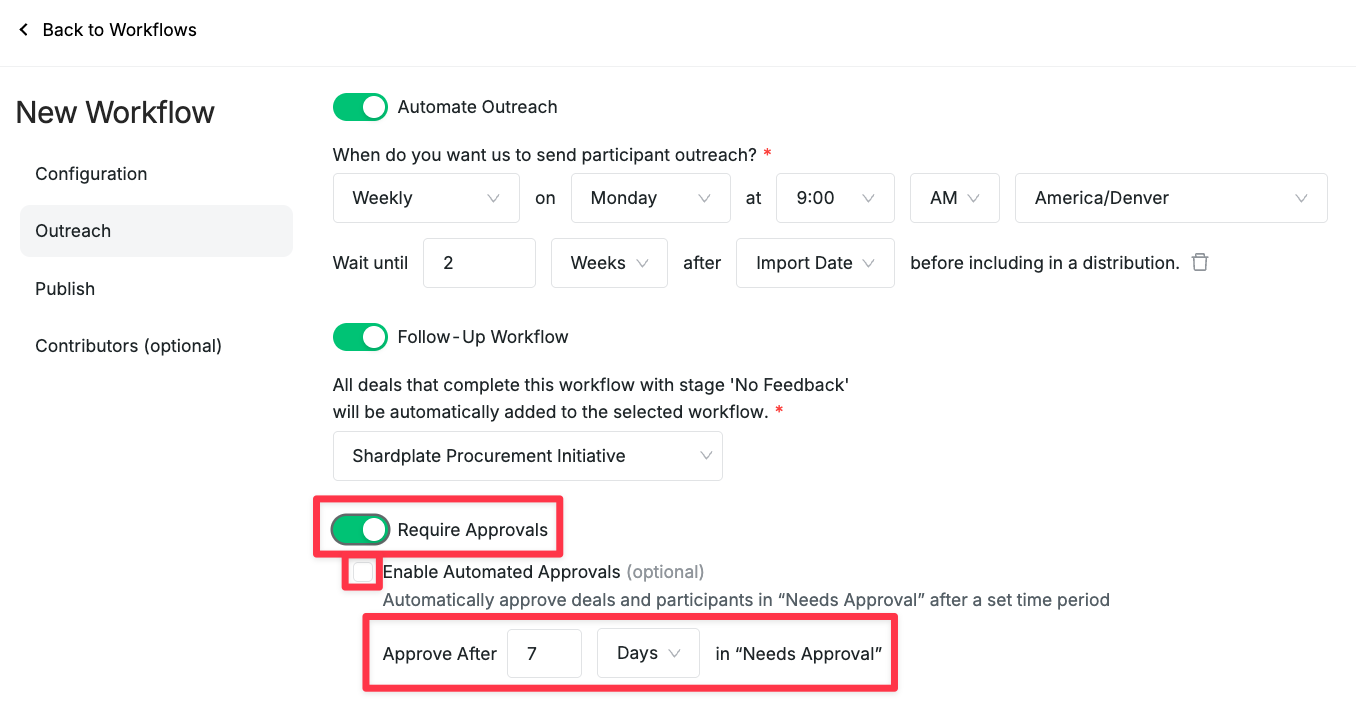
You can choose to Enable Automated Approvals which will allow the deals and participants in "Needs Approval" to be approved automatically after a set period of time. You determine how many days, weeks, or months deals and participants must remain in "Needs Approval" before being automatically approved.
Note: Weekends are included in the count of how long a deal or participant have been in "Needs Approval." For example, if a deal is added to "Needs Approval" on Friday, the deal will be automatically moved to "Ready for Distribution" on Monday. - (Optional) Set up Participant Outreach Criteria. This includes Participant Auto-Exclude Options and Participant Outreach Requirements. By default, any participants that have been contacted in the last 30 days or have previously provided feedback will be excluded. You can change or adjust these requirements by changing the number of days, months, or years. You can also add additional Participant-level filters to determine which participants qualify for outreach (e.g., require that the Participant is Primary). If you have Automated Outreach turned on, only participants that meet these criteria will be automatically included.
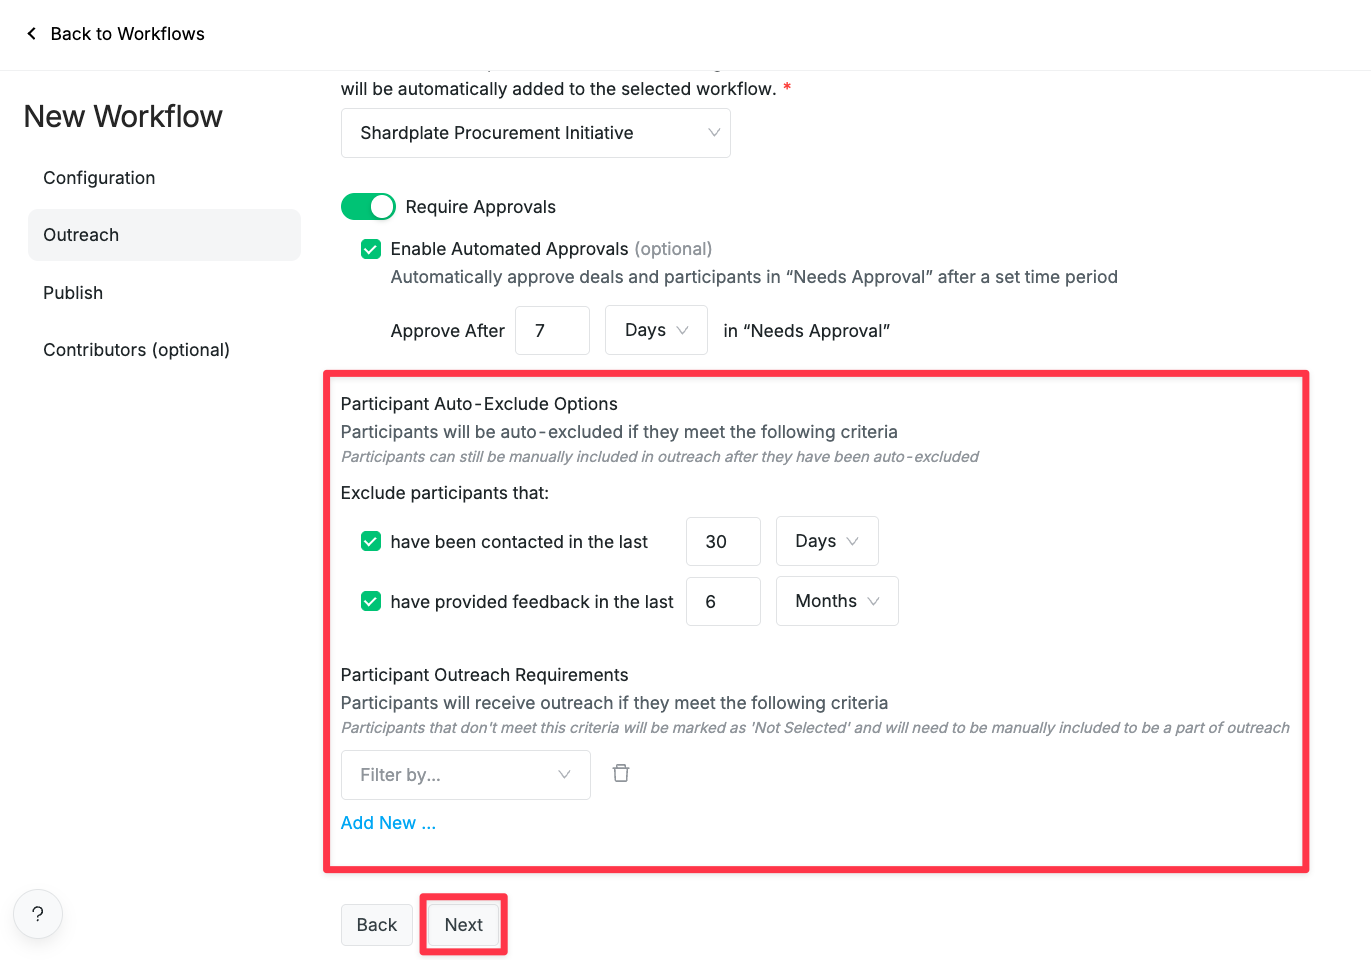
- Click Next to move onto the Publish settings.
Publish - This is where you can choose to Automatically publish interviews or choose to Manually publish interviews. If you choose Automatically publish interviews, you'll have the option to assign an Admin to be notified if the automatically publishing fails due to any system errors.
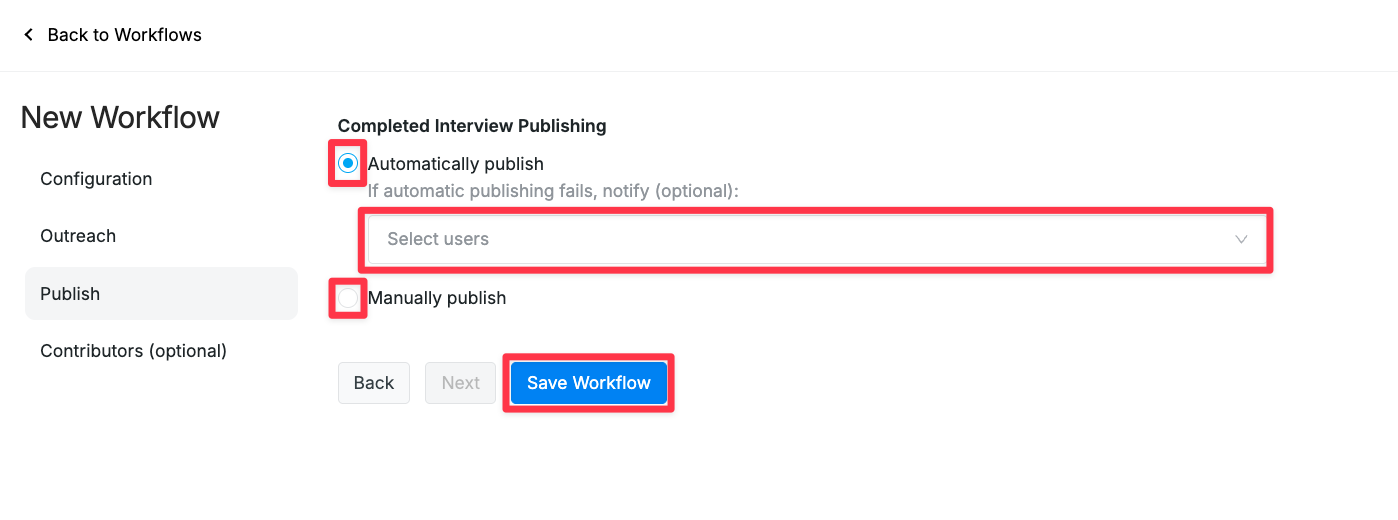
Click Save Workflow.
A pop-up will appear asking if you want to Evaluate existing deals to add to the workflow, or if you want to Create Workflow (without evaluating the current deals).
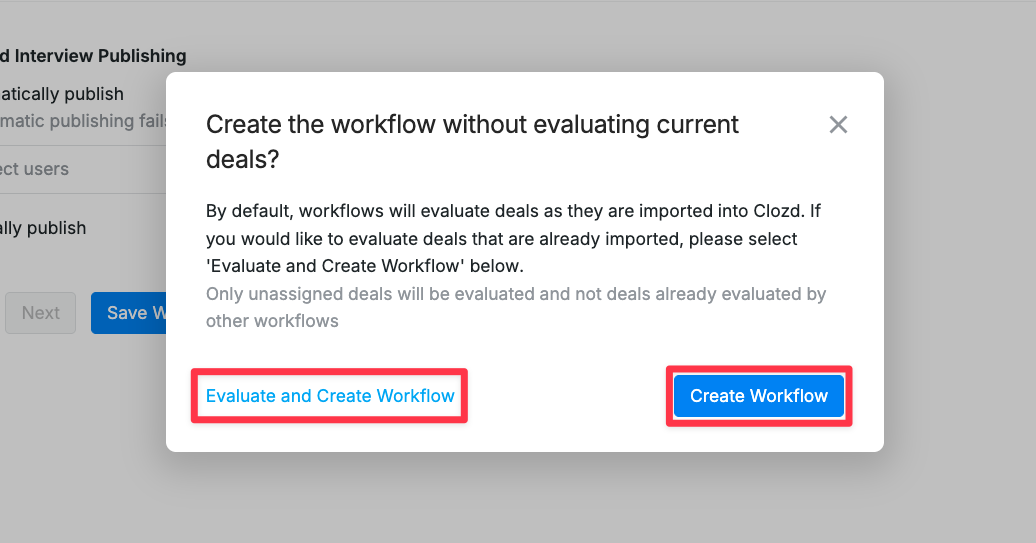
If you already have deals in this program that you'd like to evaluate against this Workflow's criteria, click Evaluate and Create Workflow. This will compare the current unassigned deals to the criteria of the workflow you've created. If the deal criteria matches, the deal will be included in this workflow.
You can also evaluate workflows later by navigating to the Unassigned Deals page in Workflows. Otherwise, click Create Workflow.
If you would like to add contributors before you create the workflow, click on Contributors (optional) on the left hand side of the screen. See below for more information on the contributors.
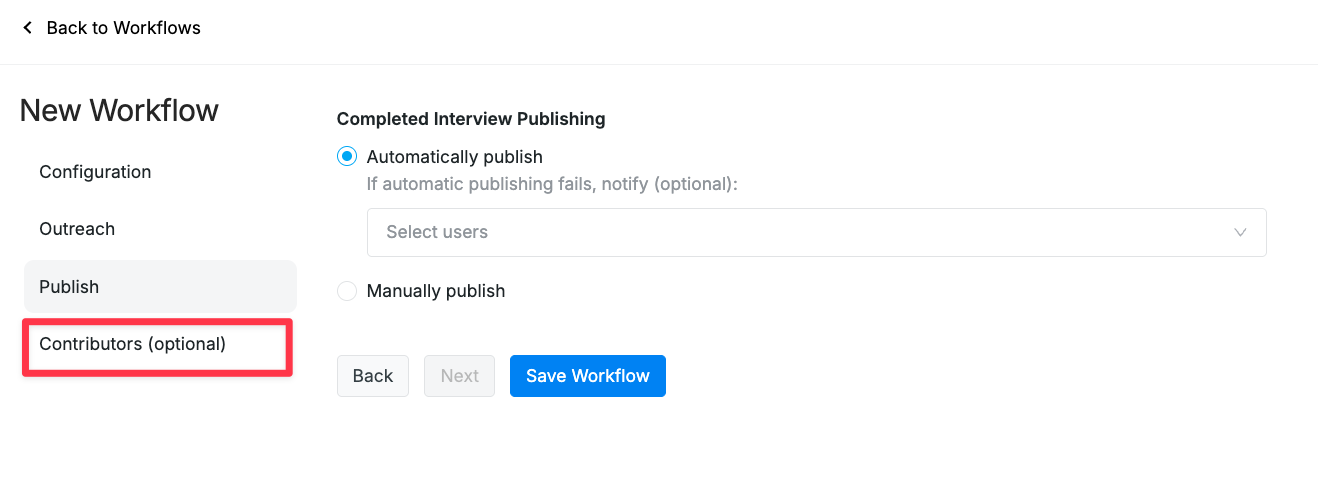
Contributors (optional) - (Optional) Assign Sales Reps to help with Contact Collection and Approvals. If Contact Collection is checked, Sales Reps will receive a notification for any of their deals that need attention (e.g., Incomplete Participant Data or No Participants). If you have Approvals turned on (see Outreach), you can also assign the Sales Rep on Deal to approve deals before outreach.
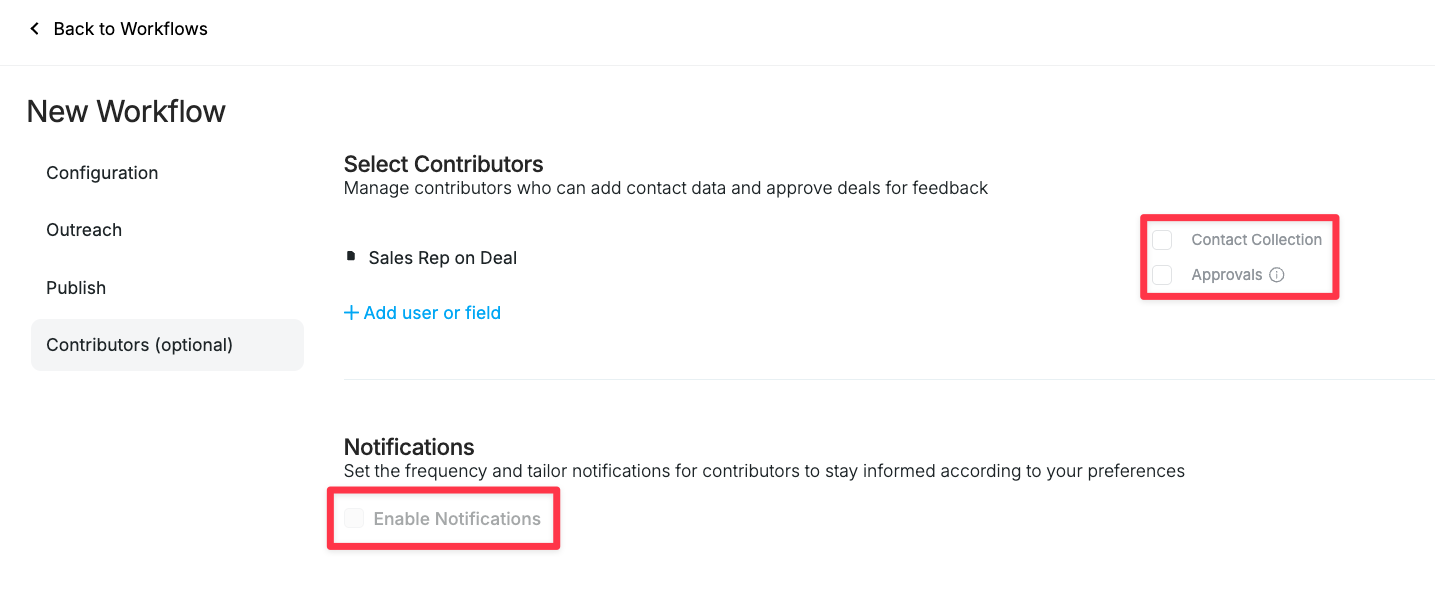
Note: Selecting Approvals automatically selects Contact Collection, but you can select Contact Collection without selecting Approvals.
Once you select either Contact Collection or Approvals, notifications for the user(s) will be turned on. Select the Interval for how often to notify the contributors(daily, weekly, bi-weekly).
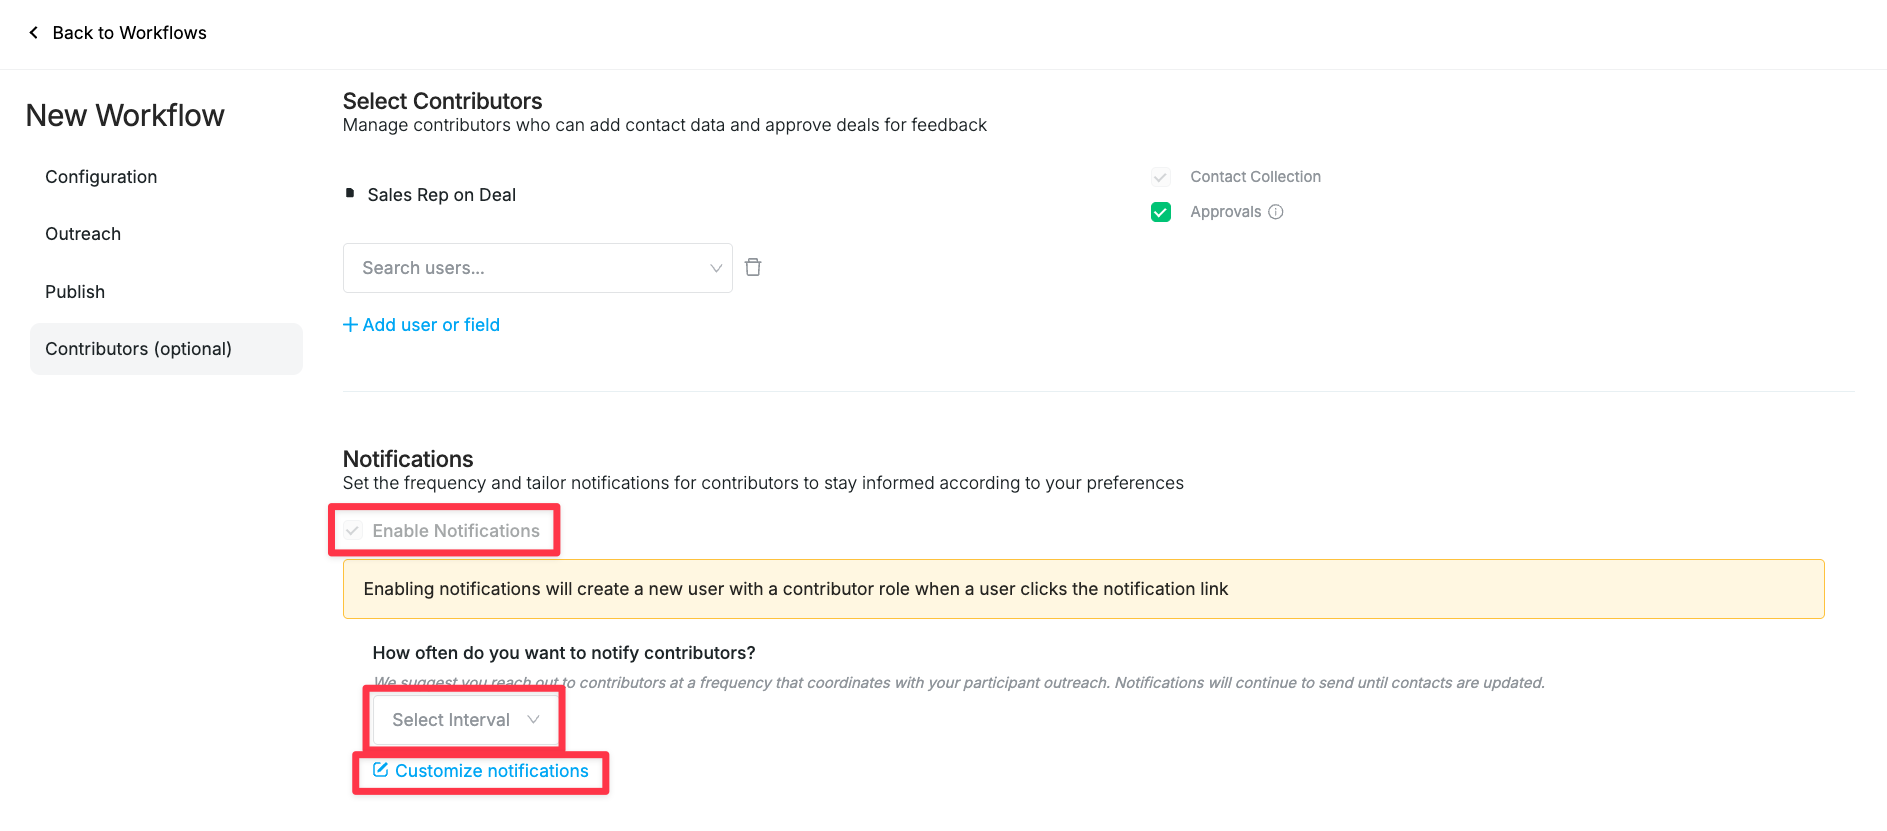
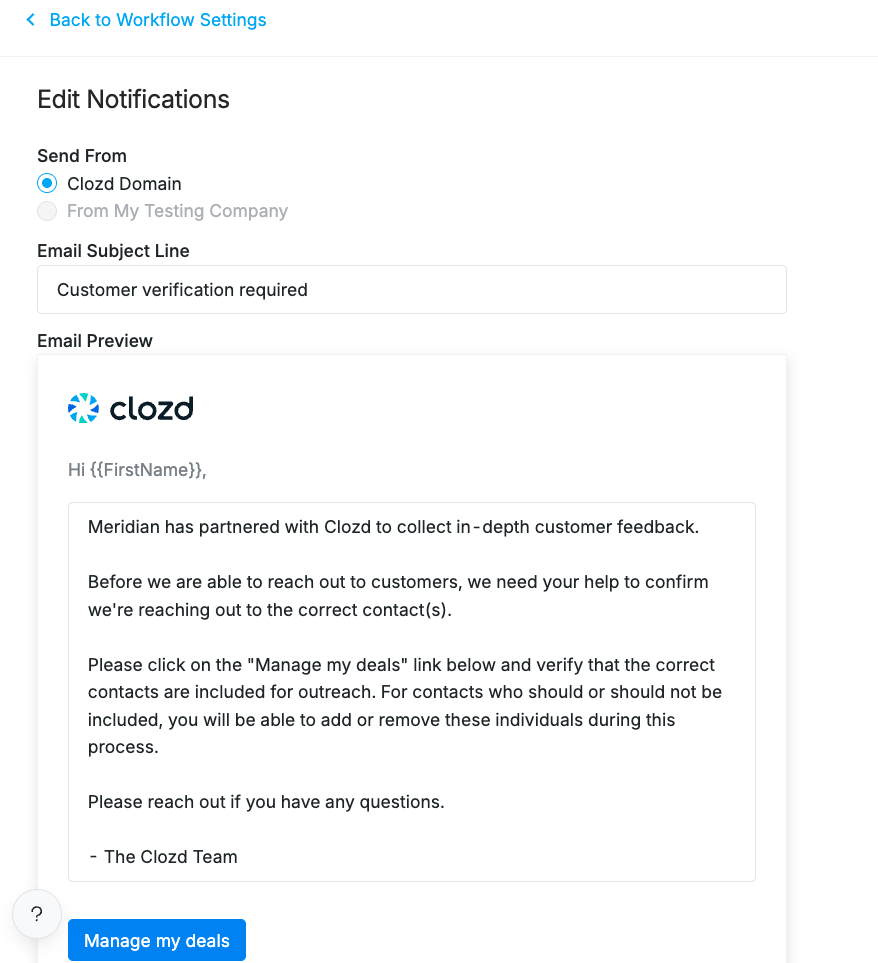
Below Select Interval is an option to Customize notifications. This has a pop-up window with an example email you can edit to your liking. This email will be sent to the contributor assigned above to approve or reject deals that need attention.
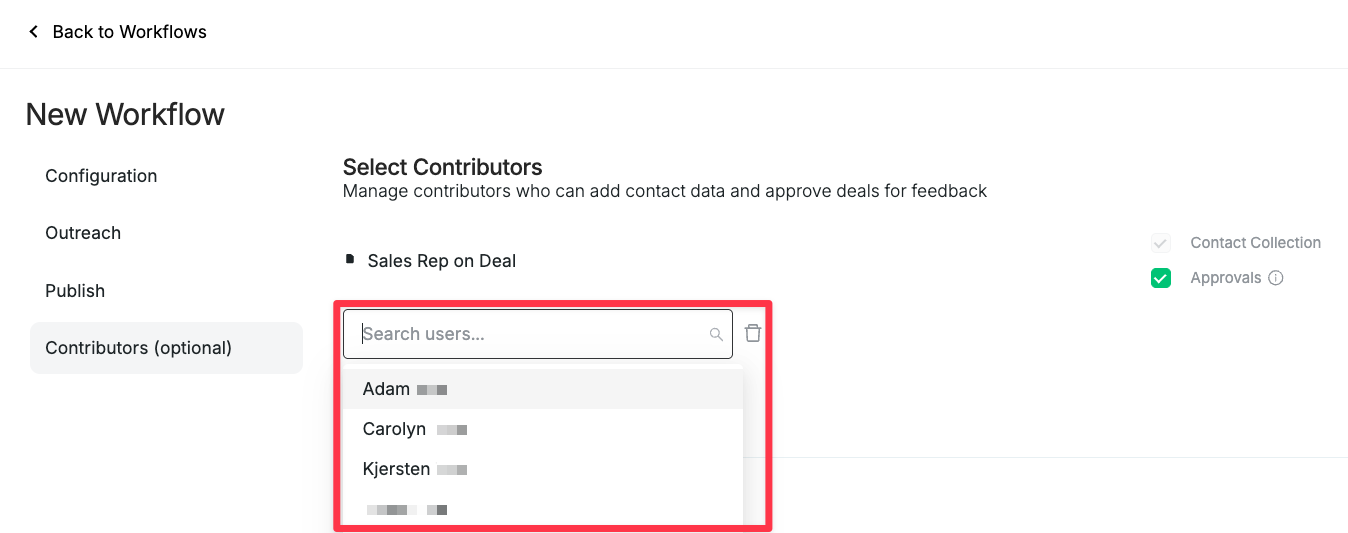
- (Optional) Add additional contributors from the list of users. These additional contributors will receive a notification for their deals in the Workflow that need attention. Program admin or Sales leaders are often good candidates to be included as contributors.
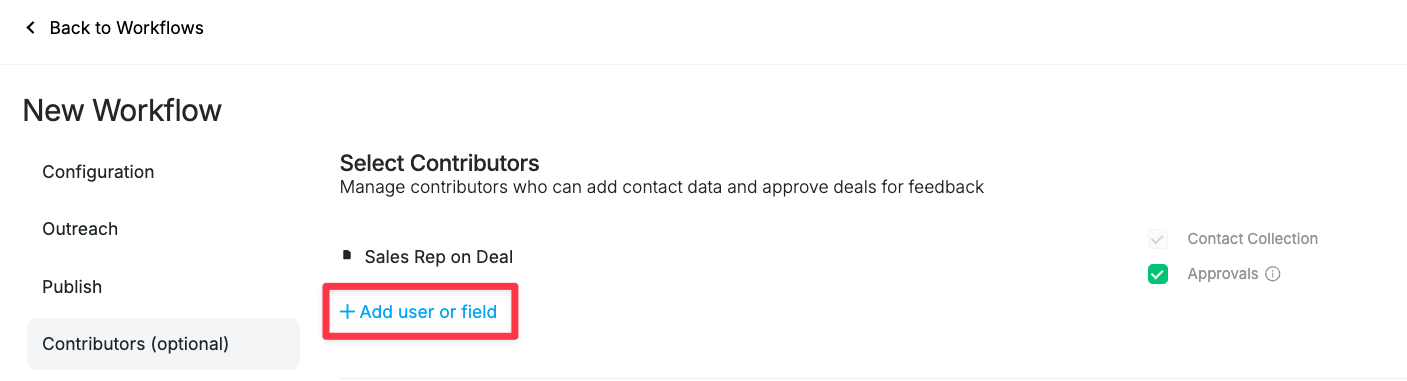
Once you click + Add user or field, you can select a user from the dropdown. The selected contributors will receive emails from Clozd that will allow them to approve or reject deals that they're involved in.
- (Optional) Customize Metadata Fields. These are the fields that will display in the contributor portal.
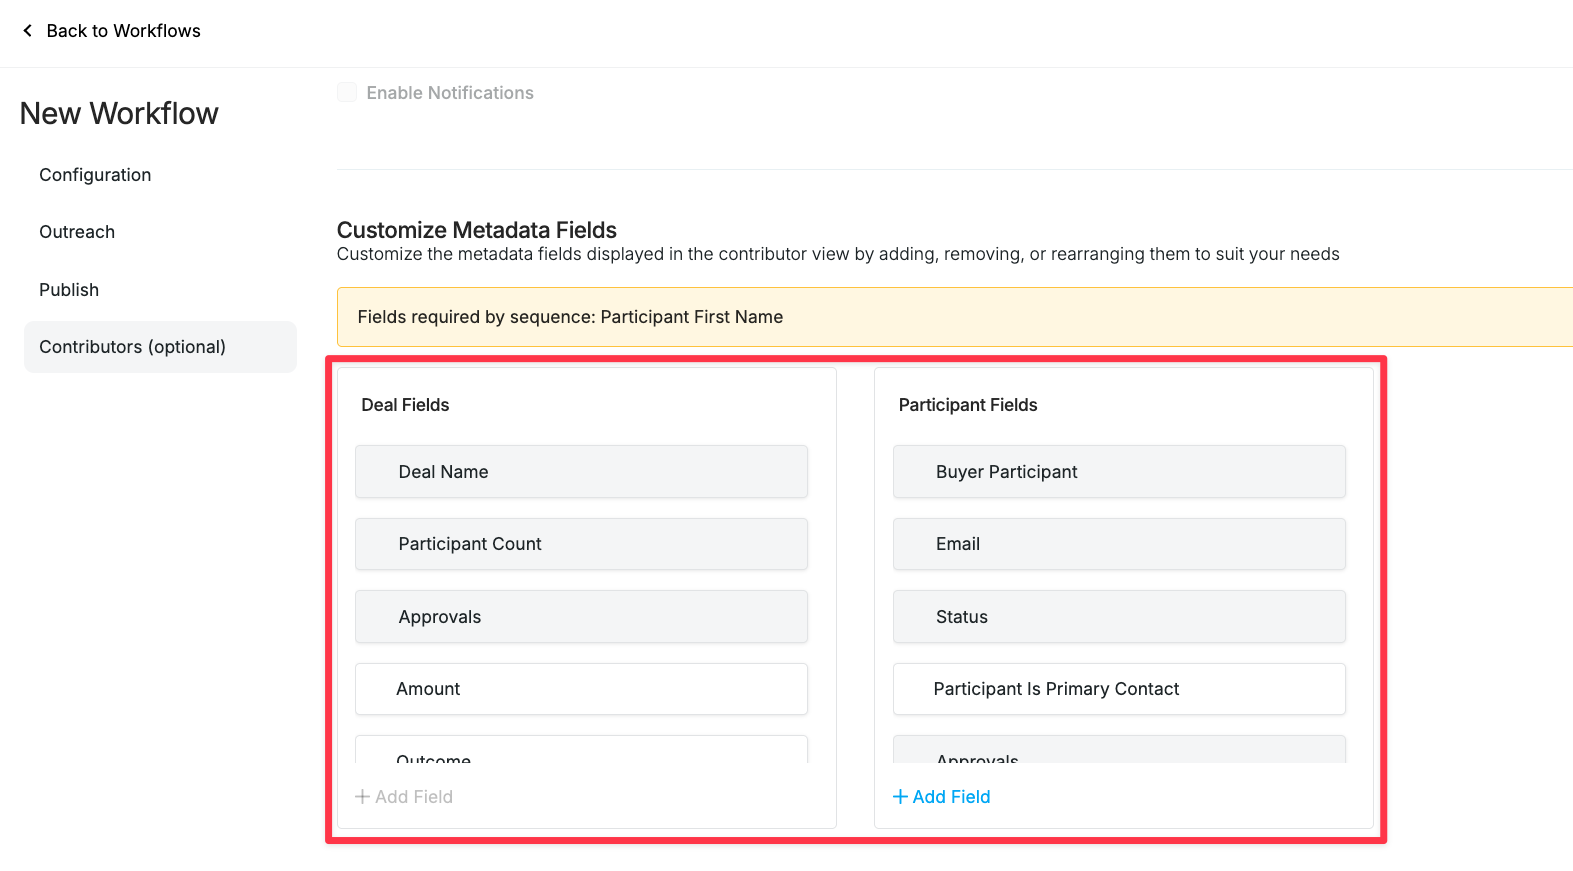
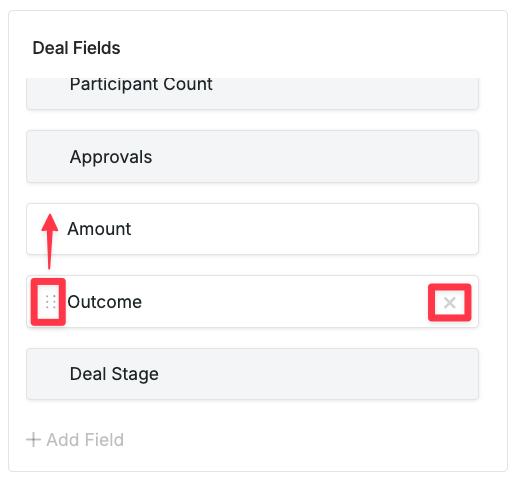
If a field is greyed out, you cannot customize it. Otherwise you can either customize, delete, or move the field around the other white fields.
Grab the 6 dots on the left side of the field to move it, and click the X on the right side to remove it.
Once you have the sections filled out of your choosing, save the Workflow.
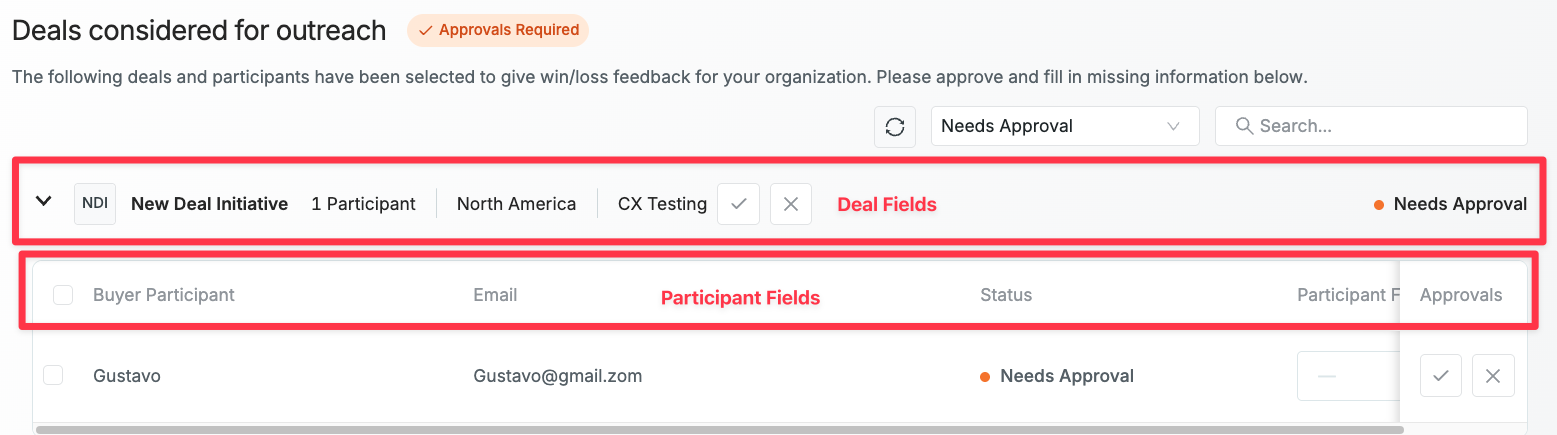
Here is an example of where the fields show up in the contributor portal:
The Workflow will now be added to your Workflows conveyor belt, and any new deals that come into the Clozd platform will be evaluated against the Workflow criteria.
Questions?
For questions about sequences or troubleshooting, please contact support@clozd.com.