
Overview
Applying filters in Clozd Platform gives you the ability to customize the Dashboard and other widgets to only reflect the information you want to see.
This article contains the following sections:
Applying quick filters
At the top of the Dashboard tab, you’ll see all available filters. This is a useful tool that lets you filter the data that feeds into the charts and graphs displayed throughout the Clozd Platform. You can filter by fields such as Amount, Feedback Channel, Interview Type, Publish Date, Segment, Primary Competitor, and more.
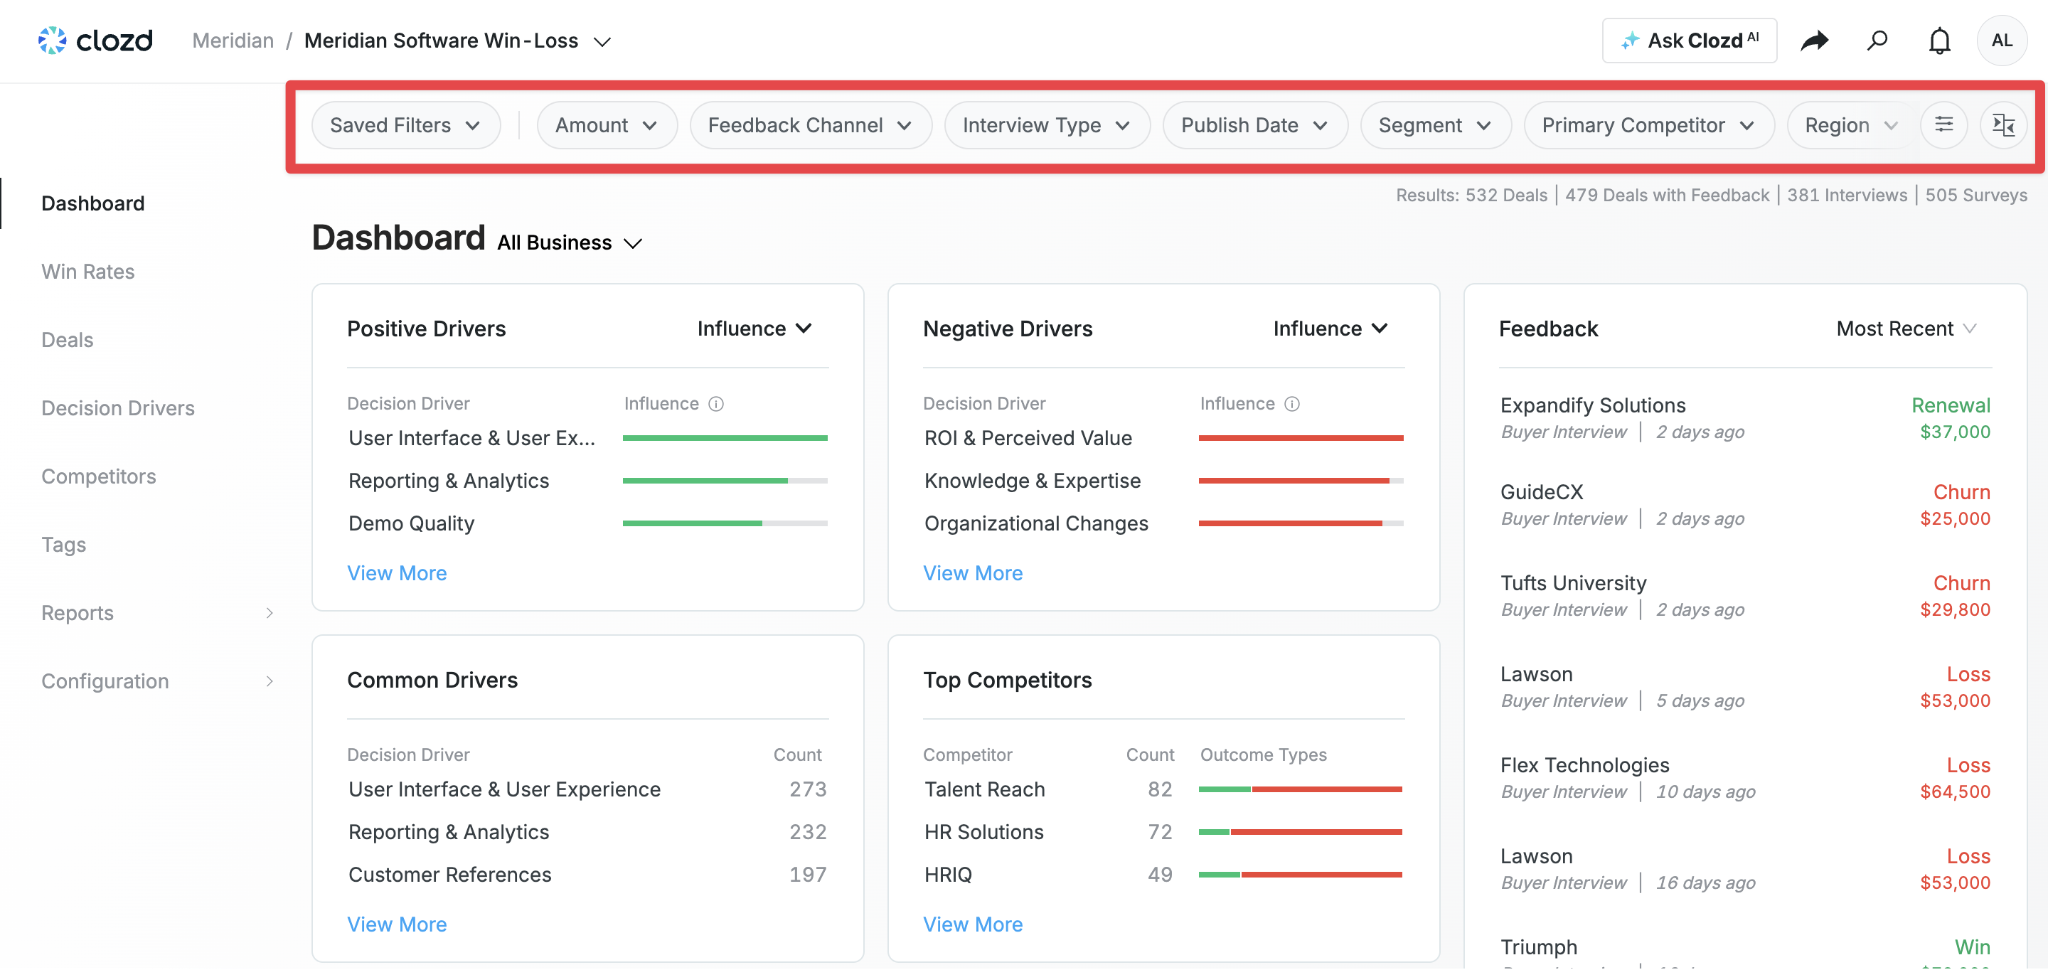
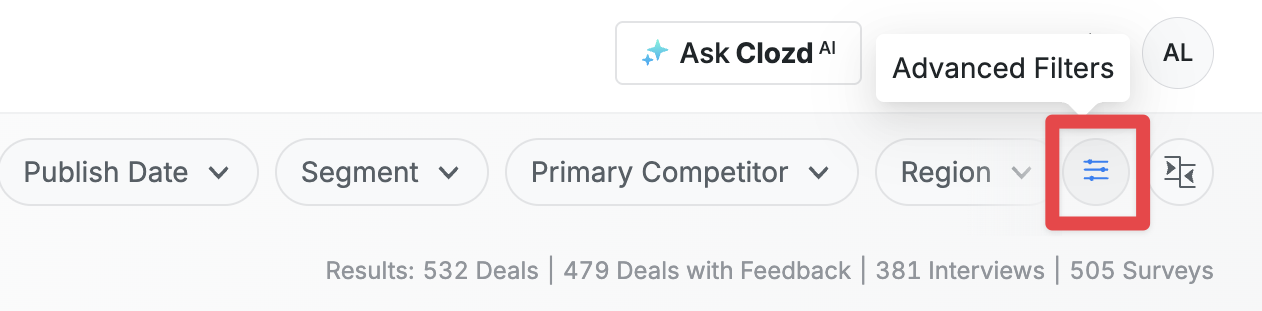
More fields can be added to the banner by clicking the Advanced Filters button on the right hand side of the banner.
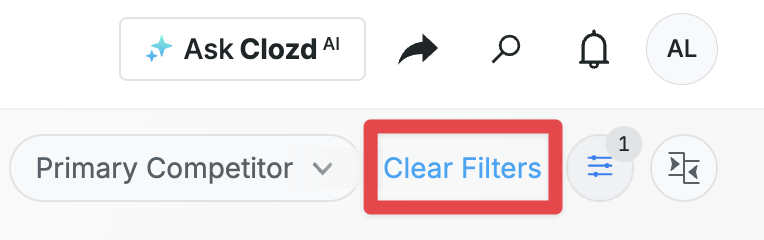
Note: Once applied, the filters remain applied throughout the entire platform. If you navigate to another page, the data on that page will still be filtered to the criteria you have set. To clear the filters, click Clear Filters in the top right corner of the page.
Applying advanced filters
Another way to apply filters is to click on the Advanced Filters button at the top right corner.
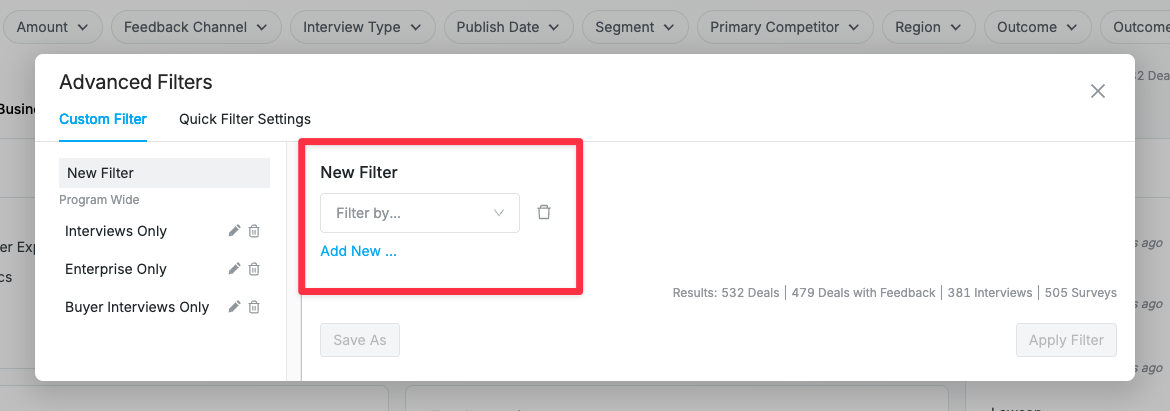
Follow these steps to set up a filter:
- Click on Filter by and select a field from the dropdown to filter by such as Closed Date or Amount.
- Another box will appear that is the Operator. The dropdown contains options such as equals exactly, does not equal exactly, is greater than, is greater than or equal to, is less than, is less than or equal to, is between, is not between, is blank, is not blank, contains, and does not contain. Depending on the field selected, different operators will be available. If you’re filtering by a field such as Participant First Name or Email, it's best to use contains as the operator to account for a typo or extra space that operators like equals exactly would otherwise filter out. Make sure to select an appropriate operator for the type of filter you are trying to set up.
- The last box that will appear is the value field. This is where you type in the information you're trying to find. Fields with predefined values such as Outcome will have a dropdown to choose from.
Note: Fields that have predefined values are called picklists. Only picklist fields have dropdown options to choose from in the Advanced Filters. - If you'd like to add additional filters, click on the Add New button and select Add Filter or Add Logic Block. Use a filter when you just need one simple criterion to narrow articles, like a category or tag. Use a logic block when you need multiple criteria working together (AND/OR) to handle more complex targeting.
- You can add as many filters as you'd like by clicking the “Add filter” button beneath the filter you just added and repeating steps 1–3.
- Once you're done setting up your desired filters, click Apply Filter. Now the filter you have specified will continue to apply as you navigate to different pages within the platform.
Here’s a real-world example: If you wanted to see data on deals closed in Q3 of 2025 with amounts greater than $100,000, then you would apply these filters:
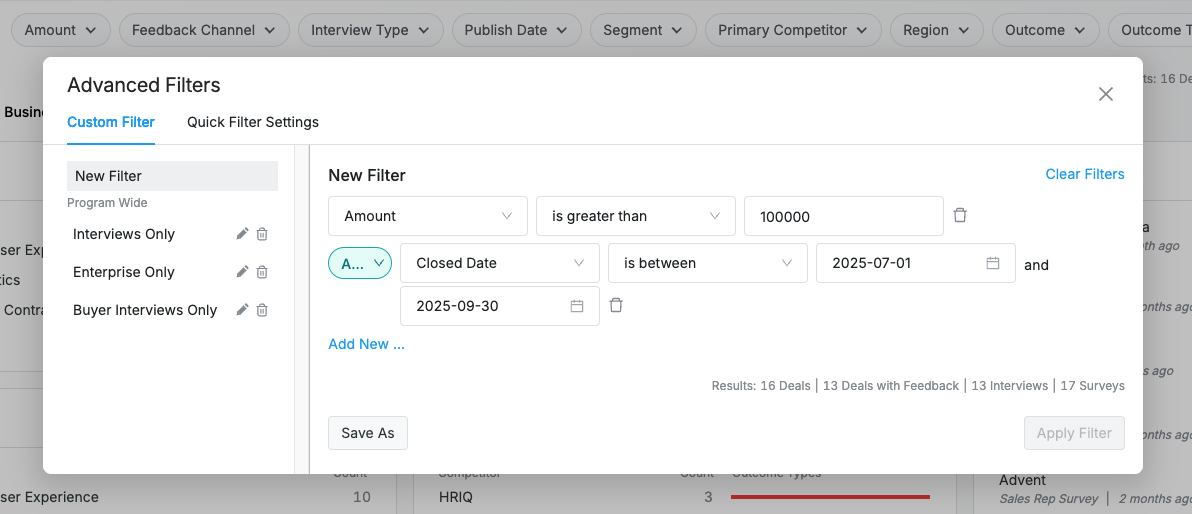
16 deals met my criteria, and now the charts on the Dashboard page are filtered according to my specifications. If I navigated to other tabs within the Clozd Platform, my filter would continue to apply unless I removed the filters by clicking the Clear Filters button on the top right of the page.
Saving filters
Once you've created your advanced filter, you can save it. To save a filter for future use, click on the Save As button in the bottom left corner after applying desired filters.
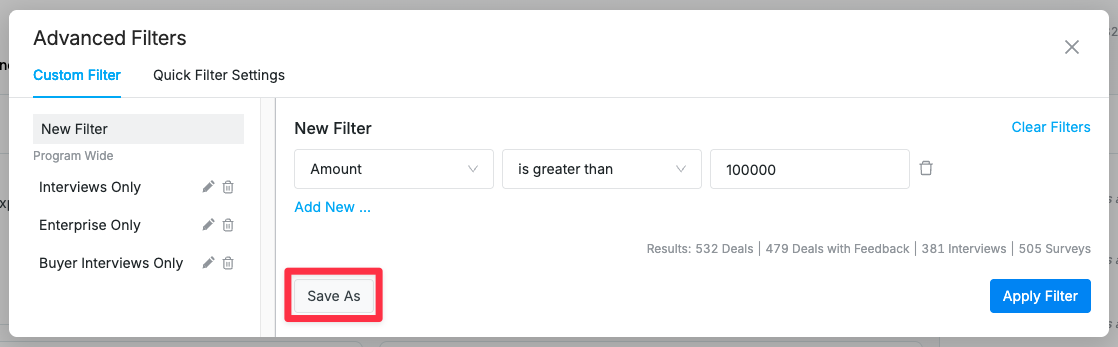
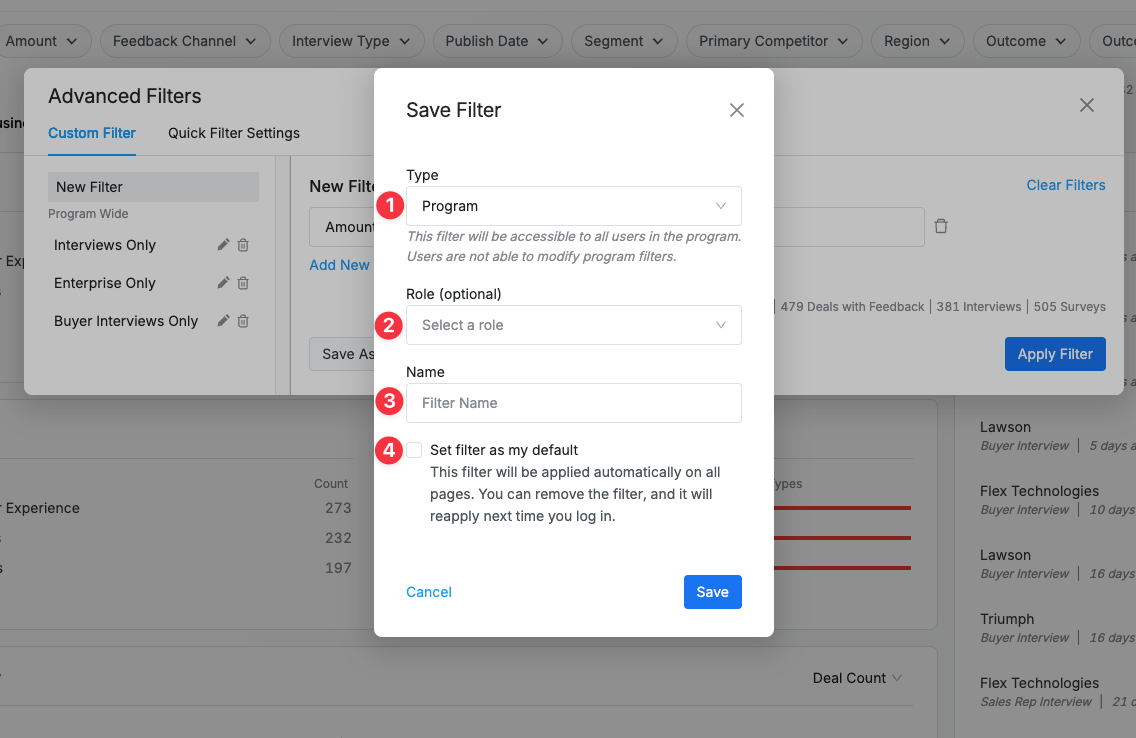
A pop-up will appear requiring certain information to be filled out in order to save the filter.
1. What 'Type' of filter this is. Select Program if you want all users to be able to view this filter or Personal if you want this filter to only be accessible to you. Note that only admins can create program-level saved filters.
2. Optionally, you can choose which user roles can have access to this filter.
3. Name the filter.
4. If desired, check the box to set the filter as your default view every time you log into the Clozd Platform.
Questions?
For additional questions, please contact support@clozd.com.